I’ve made a few of these quick knit skirts over the past few years. And by quick, I really mean quick - I whipped this one up in about 20 minutes. BAM. Now, there are a few different ways you can go about making one of these, depending on how detailed and precise you want to be. But I thought I’d show you one of the simplest and quickest ways I know. It only involves two rectangular pieces of fabric. No need to worry about getting the exact waist to hip curve, since the stretchy knit fabric will just conform to your body.
Thats it. Two rectangles. Just a few seams. And you have yourself a skirt. read on after the jump to find out how.
supplies:
- very stretchy knit fabric. how much depends on how long you want your skirt. But definitely less than 1 yard.
- sewing machine and/or serger (optional)
- measuring tape and ruler
- tailors chalk / fabric pencil
- scissors, pins, thread, etc

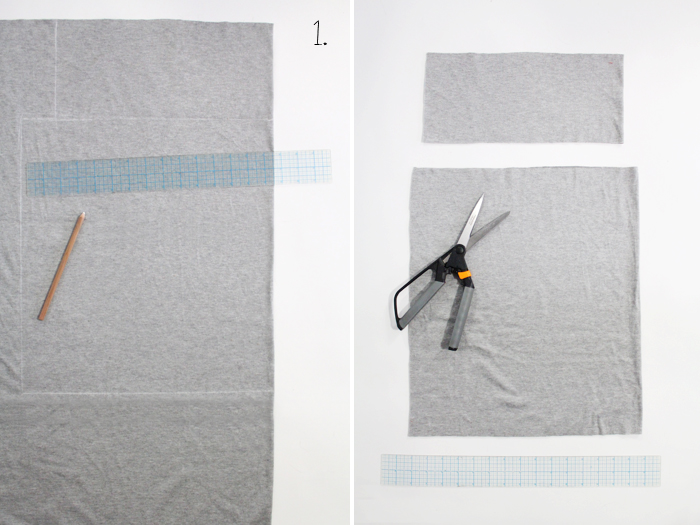
1. Using your tape measure, measure around the smallest part of your waist, or where you want your skirt to sit. Don’t suck it in or pull too tight on the measuring tape. Make sure you get a nice, natural measurement. Also, measure and determine your desired length.
Fold your knit fabric in half. Using tailors chalk or a fabric pencil, draw your two rectangular skirt pieces up against the folded edge, according to the diagram above. Cut out your two pieces.
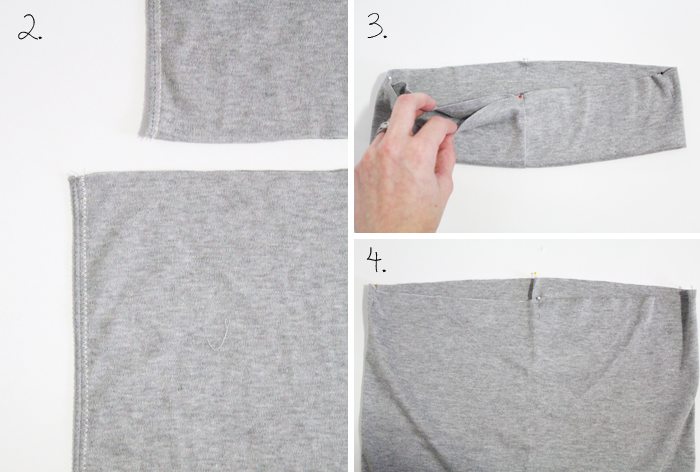
2. Using a zig zag stitch on your regular machine, or a serger, sew along the edge opposite the fold on both pieces. Use about 5/8” seam allowance. This is going to be your center back seam. (note - when working with knits, don’t use a regular straight stitch. If you don’t have access to a serger, always use a zig zag stitch. It allows for a lot more stretch).
3. Fold your waistband piece over in half, wrong sides together. So to seam allowance will be hidden inside. Mark the waistband into quarters - starting with the center back line, directly half of that is center front, and half way between those two points will be your sides. Mark with pins.
4. Mark the same four points on your skirt piece.
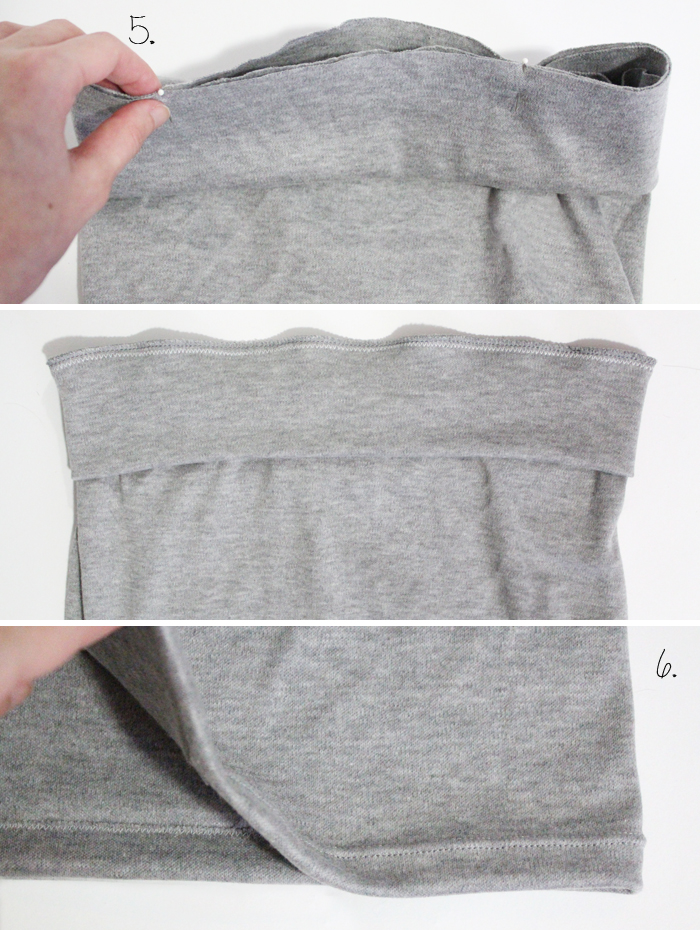
5. With right sides together, pin your waistband to your skirt piece, matching up the four points. The skirt will be slightly larger than the waistband.
Sew together using a zig zag or serger stitch. Stretch the skirt layer slightly in between your four points while sewing so that it lines up with the waistband.
6. Now just finish off your hem. Fold under the amount you left for hem allowance. The best way to sew your hem would be with a double needle. If you don’t have a double needle, again use a zig zag stitch. NOT a straight stitch.

All done!! Slip that baby on, and let me know if you have any questions.