In college, I took a fabric arts class where we did a lot of dyeing, stamping, and painting techniques. That is where I did my first Shibori dyeing, and absolutely loved the results. I’ve been dying (pun intended) to try it again ever since (um, 6 years?!).
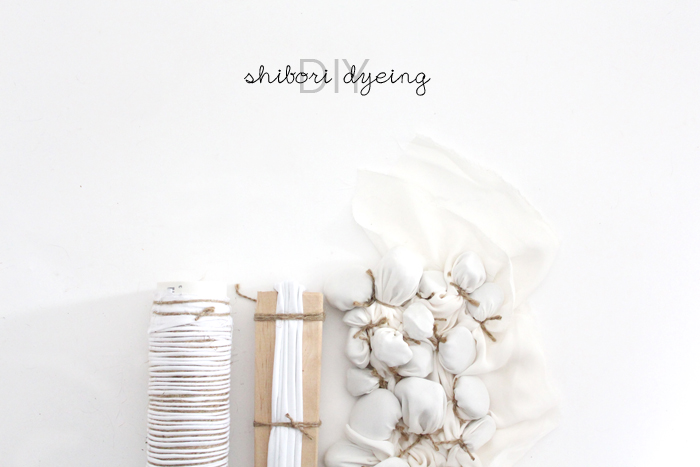
So, if you don’t know, Shibori is a Japanese form of resistance dyeing. It involves folding, wrapping, binding, twisting, stitching…. anything to provide resistance to create patterns with the dye. There are soooooo many different methods, and different looks you can create, but I decided to show you the 3 most common ones. Read on below to see how you can do it!
supplies:
-fabric dye (liquid or powder)
-fabric
-bins or buckets
-plastic
-rubber gloves
-string or rubber bands
- 2 long planks of wood
-dowel or pvc pipe
-rocks
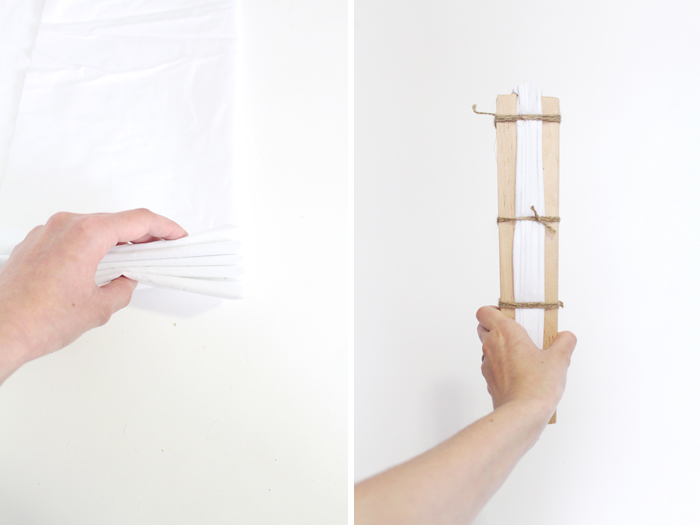
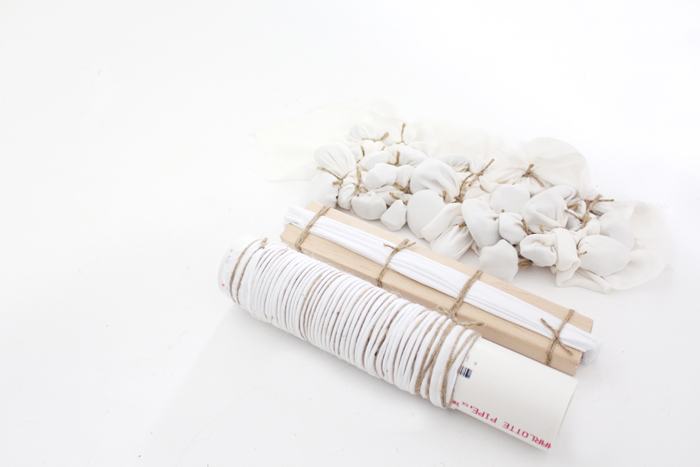
METHOD 1
accordion fold your fabric. Place between your two long pieces of wood and hold in place with rubber bands or string. Make sure they’re reeeeeally tight. The rubber bands / string act as resistance for the dye, so how many you use will give different design results in the end. It’s up to you!
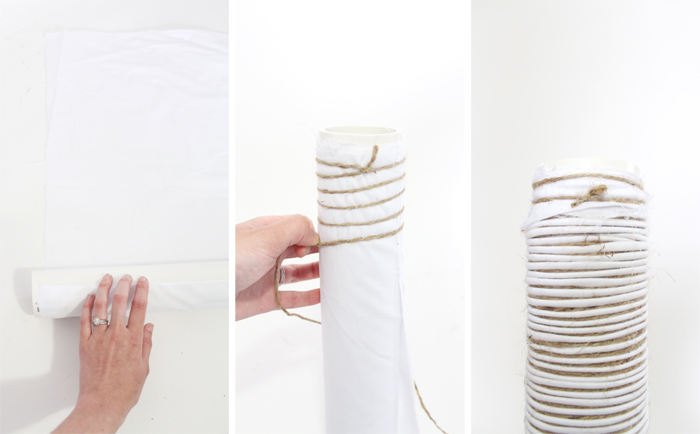
METHOD 2
Method two is a pole wrapping technique. PVC piping is probably the easiest tool to use, but you could use and cylindrical object.
Wrap your fabric (you can do it vertically or diagonally) around the pole and hold it nice and tight. Tie a a piece of string around the top, and continue to tightly wrap down the fabric and pole. When you reach the end, knot it off. Now push and scrunch the fabric up towards the top as much as you can. Again, the tighter the compression, the better.
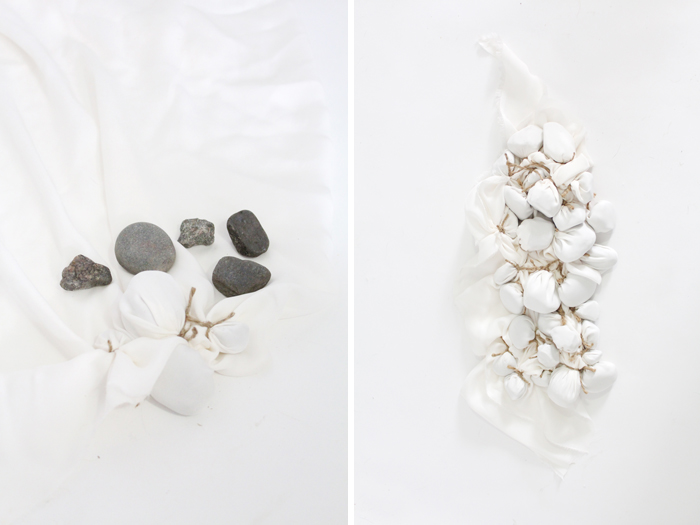
METHOD 3
The last method involves binding objects. The most common object used is rocks, but you can use large beads, marbles, etc.
Place each object under the fabric and bind tightly with string or rubber bands. Place each rock as close or as far apart as you’d like. Do it in one section, or cover your entire piece of fabric, like I did!
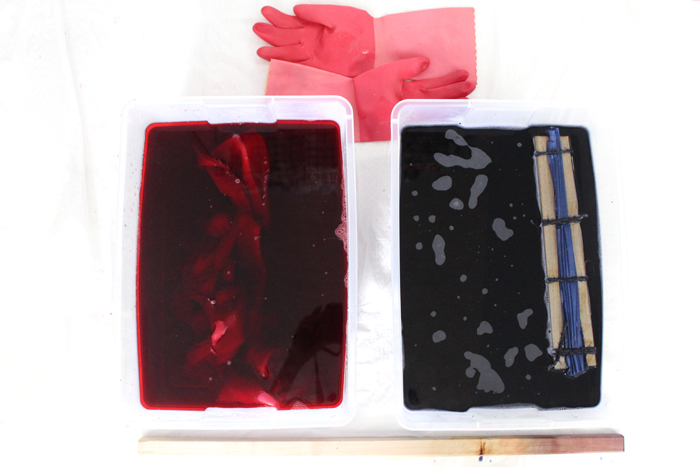
Place plastic down everywhere you are going to be dyeing. This is very important! Cover more than you think you need to, just to be safe. You don’t want to accidentally stain anything :|. And wear rubber gloves when handling the dye!
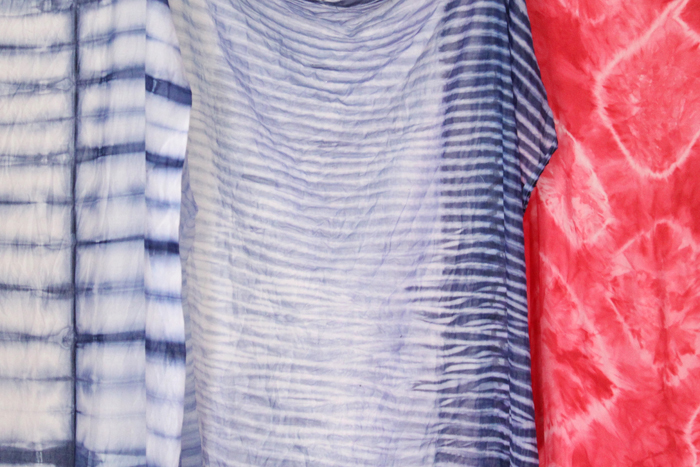
Prepare your dye in your bins or buckets according to the provided directions. You can add salt for cotton fabrics, or vinegar for silks, wools, or nylon. Immerse your fabric pieces in warm water first, and then place in your dye baths. Now, you can keep your fabric in the dye for as long as you would like, depending of the color / effect you are going for. For example, I left all three of mine in for about 7-10 minutes each. It ended up being perfect for the rock bound fabric, since I was going for more of a pink color than a deep red. But I wish I would’ve left my pole-wrapped fabric in for longer, since the majority turned out pretty light.
When it is time to remove your fabric from the dye, rinse in cold water. Remove your twine/rubber bands and rocks, etc. and continue to rinse until the water runs clear. Afterwards, make sure to wash (by hand or machine) in warm water with a little detergent, too, to eliminate all color running. let dry.
Ta-daaaaaa, you finished your shibori!
Check back tomorrow to see what I made with my first of three new fabrics. It’s pretty awesome, if I do say so myself.